 I’ve got some history with model kits. I built model airplanes as a kid (the ones that you had to paint yourself and everything). I’ve built gunpla, though mainly the 144:1 scale HG kits. Figure-Rise Wild Tiger is my first Master Grade kit, and probably the biggest one I’ve built to date. I was going to take really detailed progress shots of my building the kit, but I got a bit carried away and forgot. I’m not going to do step by step instructions here, because Bandai kits have really clear and good instructions that are easy to read even if you don’t know Japanese, but I’ll try to include some things that I have seen people ask about.
 The instructions list the tools you need for building the kit:
- small cutters – a hobby knife works fine too – for cutting the pieces from the frames
- a small screwdriver (this is only for building the stand)
- tweezers
- cotton swab and a cocktail stick or a toothpick (only necessary if you use the water slide transfers)
I also recommend having these at hand:
- super glue – like me you may have an accident and snap something the way it’s not supposed to snap, but it’s usually nothing that super glue can’t fix
- a very fine point black permanent marker OR black model paint and a thin brush
When I opened the instruction booklet, my first thought was “I can’t do this, what the hell have I gotten myself into?” because it’s been a few years since I last built a model kit. Once I’d gotten the first part assembled, it started going better. I’m a very slow builder because I have to check everything twice so I’ll be certain to get it right, so I think it took me around 12 hours (spread over two days) to build the entire thing.

 The instructions start from building the closed helmet head, but before you get going, flip to page 22 in the booklet. There are instructions for building the open face head with alternate parts, and also instructions on how to decorate both versions of the head. I overlooked this bit at first, and as a result I had to completely dismantle the head in the end to get the eye decorations in place for the closed helmet version. The head isn’t hard to dismantle, though, so if you want to keep switching between the open face and closed helmet heads, it just takes a few minutes to change the face.

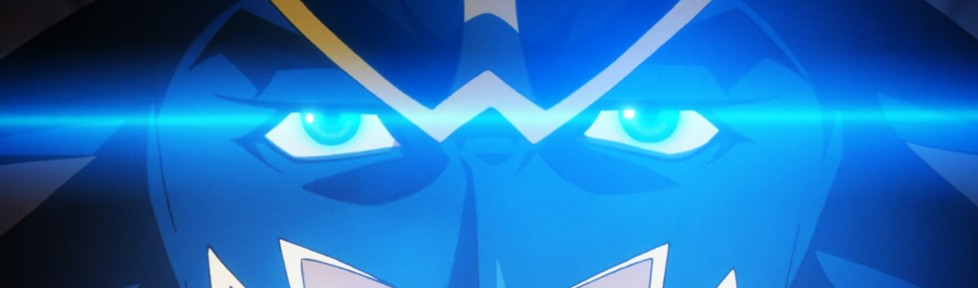
Decorating your Wild Tiger’s closed helmet head.
Once the head is sorted out, the instructions go on with building the undersuit (or soaked cat Tiger as I decided to call him). I didn’t have any problems with this part, though I should have paid better attention with attaching the shoulder joints so I could have better concealed the small scuff marks where I’d cut the parts off the frames. They’ll mostly be covered by the armor anyway so in the end it wasn’t a big deal.


I had a little boo-boo in the next part where the armor is built over the undersuit frame. I was building the leg guards and pressed two pieces of the part that goes behind Tiger’s shin together in an awkward angle and a part snapped off. And of course I couldn’t find super glue in the house so I had to take a break and go buy some. I think the parts might have held together without it because there’s an additional piece for the black light mode that goes over them, but I didn’t want to take chances.


The part I had the most trouble with was building the arm guards. It felt like there were a bajillion small pieces and I even dropped one tiny itty-bitty clear part on the floor. Luckily I managed to find it but I had some moments of pure despair there. The regular arm guards have Wild Shoot guns folded in, the actual guns are optional parts. I built everything that was in the kit – there are no extra parts that have no use in it, by the way.

I finished about 80% of the model during the first day, and did the rest on the second day.

Here’s where I stopped on the first day.

Completed model on the second day!
The decoration instructions can be a bit confusing. There are 4 sheets of decals for decorating your Tiger.
- The big silvery sheet has hand decals, trimmings and such.
- The light blue sheet has water slide transfers.
- The light green sheet has clear stickers.
- The small white sheet has alternate eye options for open face Tiger.
The clear sticker sheet and water slide transfer sheets have the exact same ones, you can pick which style decals you want to use. Water slide transfers were an epic failure for me. I was probably doing something wrong, I haven’t used them in a very long time. Clear stickers worked great, but I had problems with the fine detail on the closed helmet head and ended up drawing parts of Tiger’s “eyeliner” with a marker instead.
 I wasn’t going to use the hand decals at first, but then I tried them on one pair of hands and they looked okay so I decorated all the different hand options. If you didn’t use some of the highlight decals while building and place them under the clear parts (see page 16, step 2 of part #12), there are some decals you can use as highlights on top of the clear parts. I really recommend placing the decals under the clear parts while building, the result will look better.

MGF Wild Tiger has really good balance and can stand on his own, but there’s also an adjustable stand in the kit. You’ll need it if you ever want to use the Good Luck Mode arm, because it’s HUGE.


MGF Wild Tiger is also really big compared to regular S.H.Figuarts. He didn’t feel that big at all while I was building him, but when I posed the completed model next to the Figuarts…

I’m really looking forward to getting my Barnaby model kit now. Building Tiger was a lot of fun, and even though it felt a bit daunting at first he’s nowhere near as hard to put together as he seemed.

A long and painful gestation. But it was worth by watching the result. wow!
Wow! That is a huge difference! I knew it was bigger, but still… I don’t think I’m gonna buy this. I’m not the builder type so this is definitely gonna go wrong on my end. But the end result looks so great! Darn it. Maybe I can get my brother to build it from scratch.
I was really surprised when I realized just how big he is compared to Figuarts.
This kit is a fair amount of work so if you don’t like building things it’s probably better to just buy a regular Figuarts… They’re a bit more expensive but at least they’ll be readily assembled.
I have difficulty in sliding a small black piece which I think is the “link” between the hand armor pieces where you have to combined Wild Tiger’s hand armor (the white, black & green armor). So, in the end, I just dumped them aside and it looks ok. But sometimes it can come off a bit if I pull the hand armor too forcefully…
Is it the small black piece on his wrist? It should lock in place if you put it on the right side of the hand armor before combining the whole thing. I think I was trying to put it in the wrong place at first so I had some trouble with it, too. -.-
Yes! Exactly that piece! Boy, that was a frustrating piece to put on! But now, I understand! Thanks for the tip!
Is the hand decal the part with the silver on his knuckles and fingertips? Compared to Figuarts, which one do you like better? I mean I like the paint job on the Figuarts better but Figure Rise has the advantage of being ginormous.
Does the figure have an alternate head for the open face/closed face option? Or can the helmet can open and close?
Thanks… Seriously thinking about shelling out money for figure for the first time so sorry I have so many questions. I can make do eating cereal for two months T_T
Yep, that’s the hand decal.
I think I actually prefer MGF, it’s a bit more poseable than Figuarts, though I need to get my MGF Barnaby first for princess carry testing before I can give a final verdict.
There’s only one head, with alternate parts that you have to switch if you want to use the open face version.
That’s another reason why I’m slightly leaning towards MGF too, because of the open face version. I like the green in Figuarts better than the neon green on MGF though, and I don’t know how I will like the MGF without the extra touch ups.
What do you think about the material? With poseable figures I’m always afraid that I’m going to snap the parts off. ^_^; Which one do you think have more mass?
Compared to size, the Figuarts have more mass. MGF is actually surprisingly light compared to how big it is. The MGFs (I just finished building Barnaby yesterday) don’t feel flimsy, but I wouldn’t recommend dropping them. The Figuarts feel more like they could take some punishment.
I had a lot of trouble with Wild Tiger’s open face version, Barnaby’s was easier to decorate and also looks better.
Hello,
Is this kind of kit how model of Gundam where it is necessary to paint them?
Because this one pleases me well, but apparently he exists a version with several heads possible: http://fr.myfigurecollection.net/item/100591
Thanks you in advance
Painting isn’t necessary, but you can do touch ups with paint to improve the result.
You should fill in the detailing with gundam detail marker! It makes it look much nicer~ Check one point step here: http://www.1999.co.jp/itbig18/10180942t.jpg
They don’t sell Gundam markers anywhere here and I always forget to add them to my order. Maybe next time I order something from a store that sells them I’ll remember… XD
OK thanks you very much.
I got this model kit too (still need to find a perfect time to build this)
My plan is: I will not put the softbank & SHFiguarts sticker on the model. I decided to print some stickers with my website is written on it. So Wild Tiger will look like promoting my website 😀
Now I have to ask, how on earth do you get the decals to stick?? I just got this model kit yesterday and already assembled the entire figure and then some but no matter what I do or try, the decals I put on for the mask keep lifting up off the face. What do you recommend to keep them in their place and not threatening to fall off completely??
I admit. I cheated. I didn’t have all the stuff that’s needed to get the transfer decals to really stick in place. So I used tiny amounts of super glue. ><;; It works but you have to be really really careful with it.
how do you use the watermarks on the figure?
Reblogged this on EGGSPRESSO and commented:
Ojisan !